How to Create Lomography Photo Effect
Don’t have a lomo camera? No sweat! Now you can create great, vivid looking pictures with our new Photoshop tutorial on lomography. Typically photos captured with a Lomo camera have deep colours, vignette or blurred effects. But now, you won’t have to make a shopping expedition of getting yourself a fancy camera; these photo effects can easily be recreated in Photoshop! Although there are countless photo effects you can create with different Photoshop tools, the lomography effects can truly change your photos from dull and boring to exciting and vivid! Now, there are several ways you can create a digital photo into a lomo-esque image, but we are going to teach you how to do that using layers and adjustment tools in a few simple steps!
After learning this Photoshop tutorial and adding these photo effects, your photos will literally pop out with amazing colours and contrast. That’s the magic of lomography!
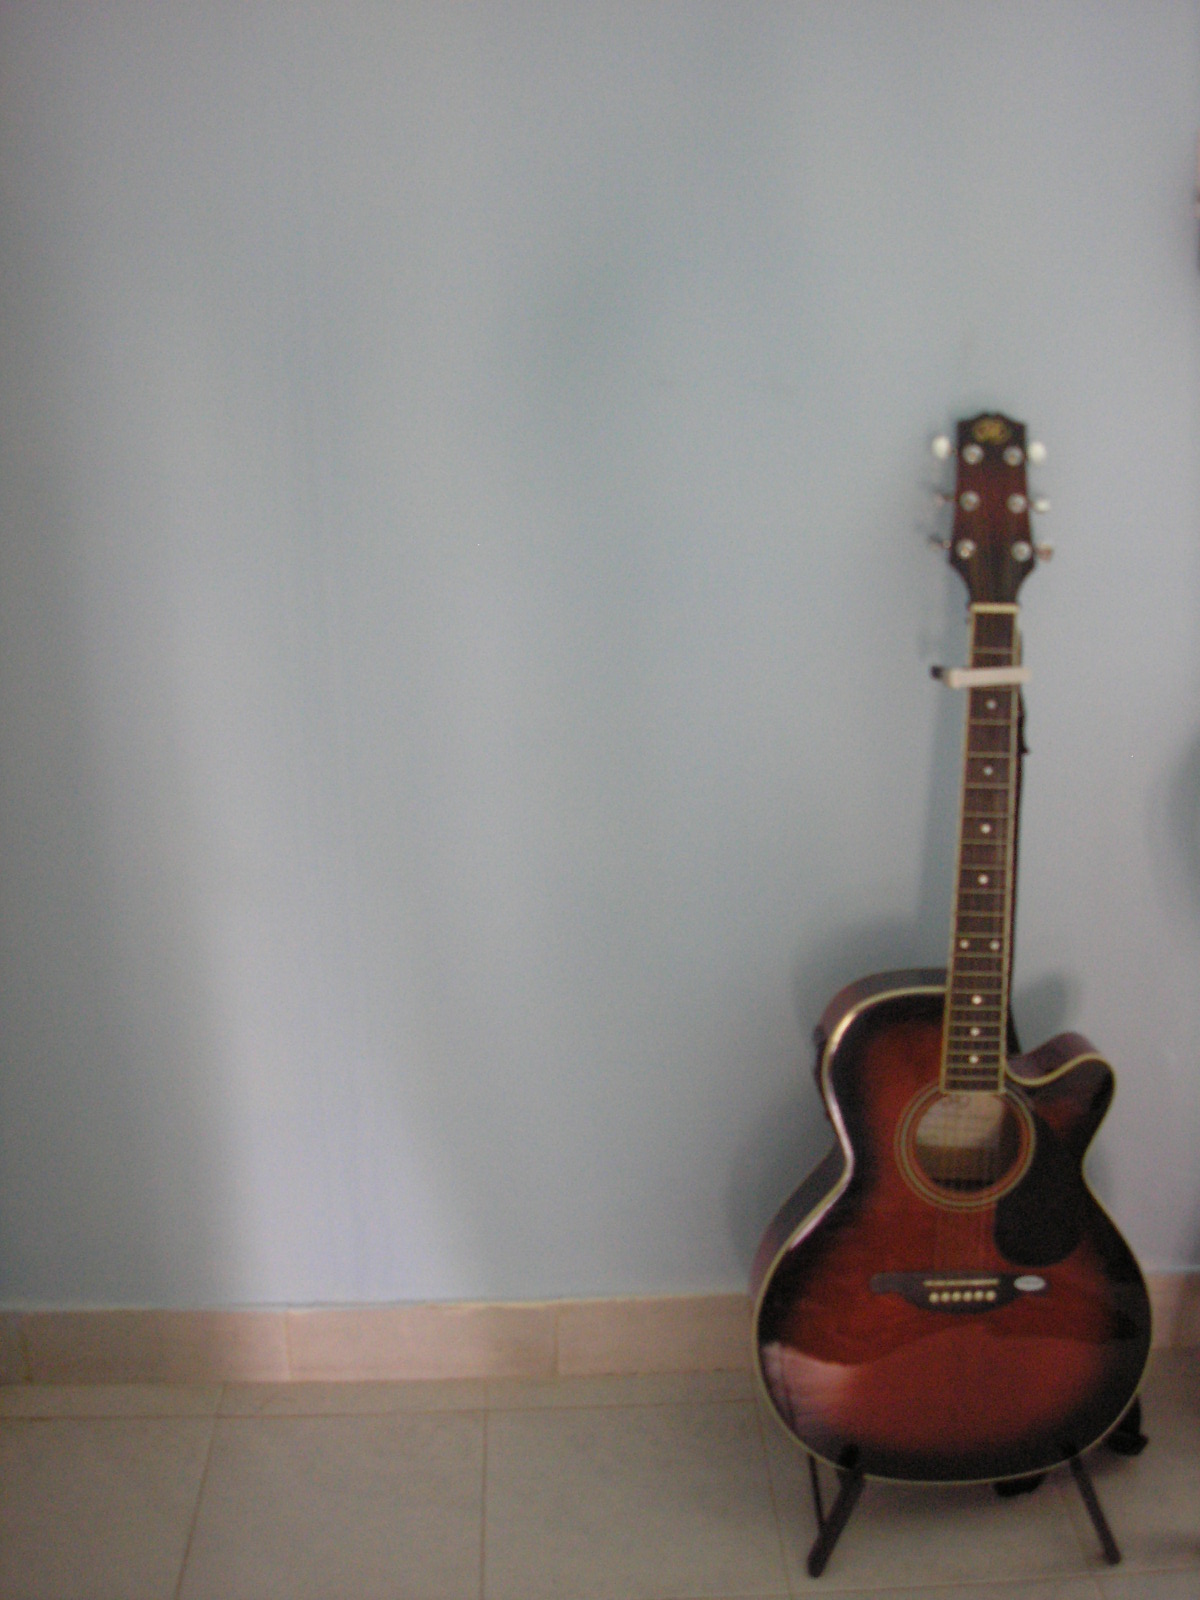
So, first thing you need to do is upload a picture in Photoshop. I’m going to choose this image and open it.
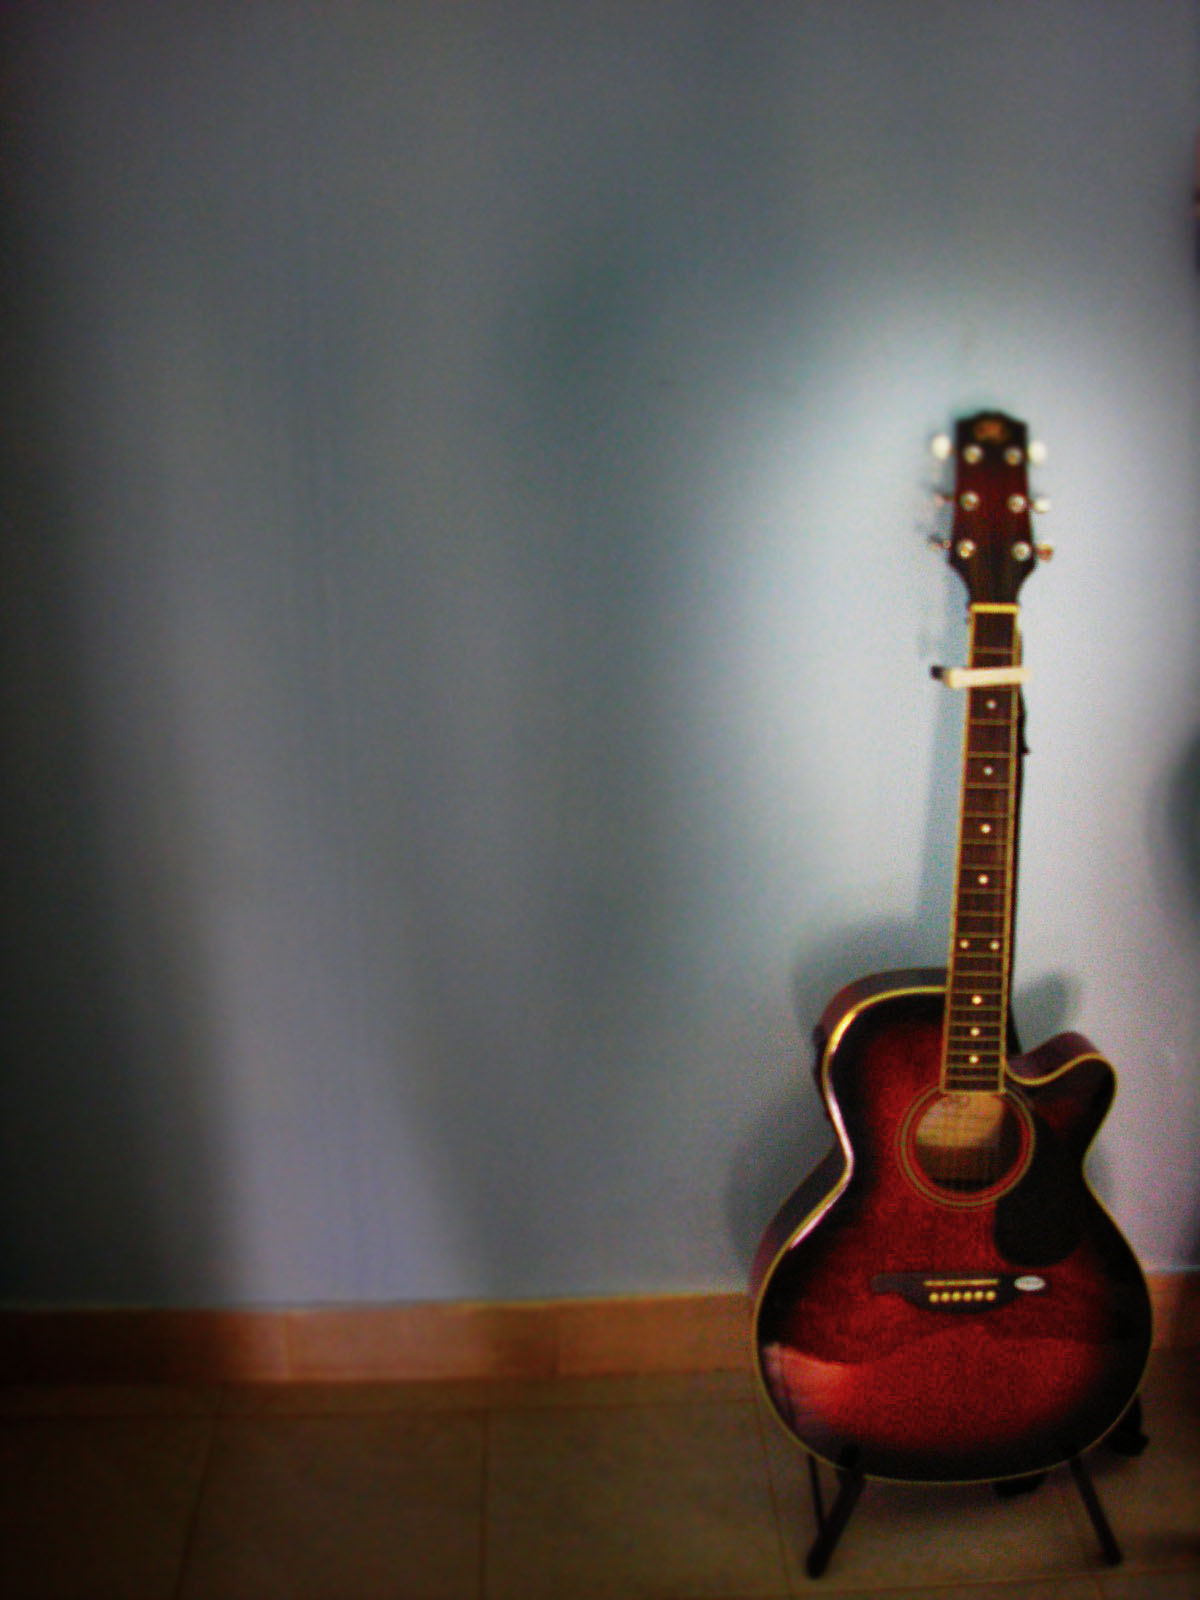
By the end of the tutorial, you should be able to create an image looking something like this:
Step 1:
Choose and open an image in Photoshop.
Step 2:
Creating a Vignette.
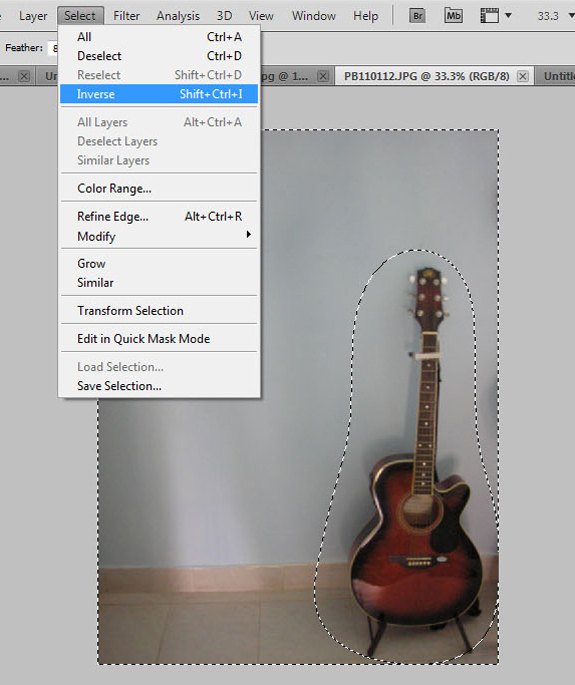
Lomo photos are known for their vignette. You can do this by drawing a freehand circle with the Lasso tool around the subject or desired focus in your picture. Select the Lasso tool and set the feather to 80-90px and start drawing.
Once you have set the feather and drawn the circle, you have to invert this selection. Go to the menu Select/Inverse.
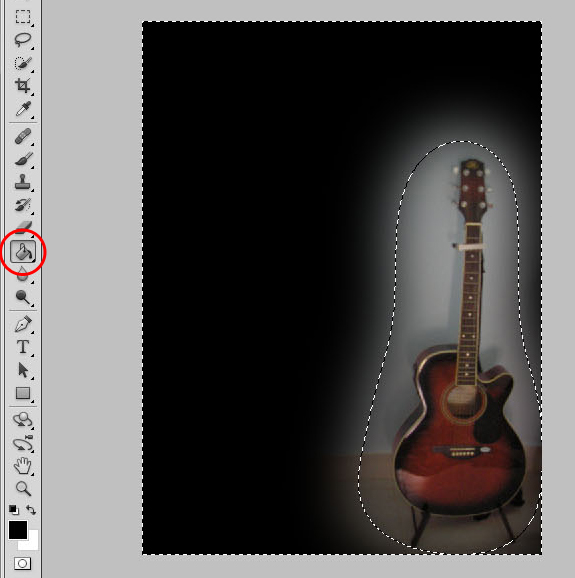
Select the paint bucket tool and choose black and fill in the inverted selection. Make sure you are working on a new layer.
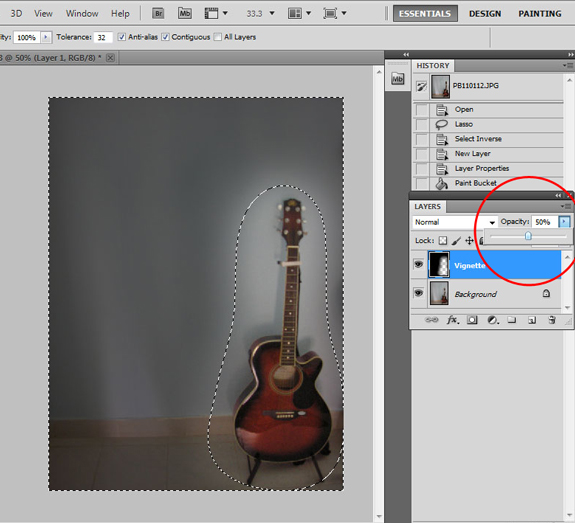
Now you have to adjust your Vignette layer opacity to give it softer edges resembling a vignette effect. You can do this by adjusting it to 30-50%.
Step 3:
Adjusting your colours.
Now you have to adjust your colours. Click on your background layer and then click on that small black and white circle at the bottom of the layer box and select Curves.
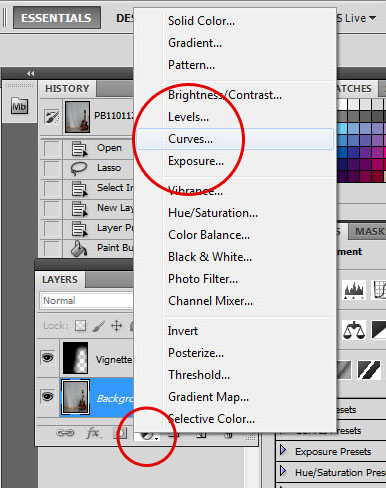
A new layer will form. In the Curves pop-up window, select RGB as the channel, if it isn’t already, and drag the line in a rough S shape.
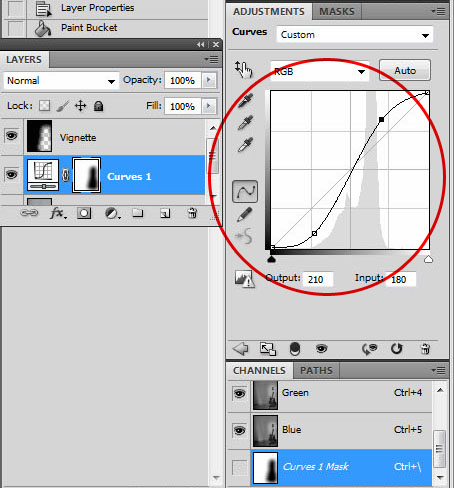
Once you’re happy with the results, merge all layers by flattening the image: Layer/Flatten image
Now for the final step in colour adjustments; make a new layer and label it as Hue.
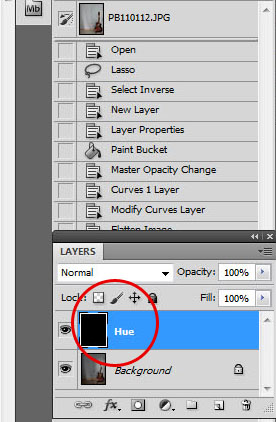
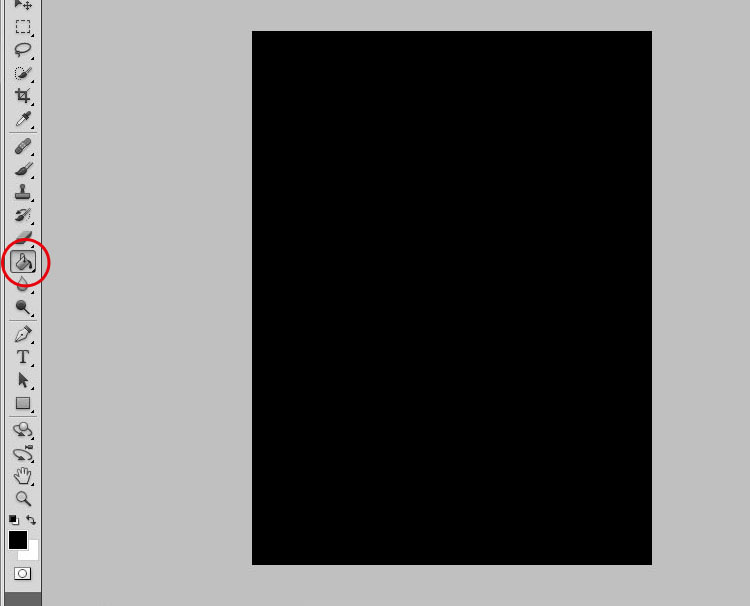
In the Hue layer, select the paint bucket tool again and choose black and fill in your photo. It should turn completely black.
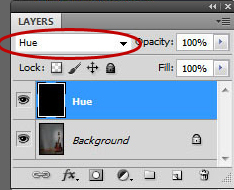
Now change the Blending mode from Normal to Hue.
Your photo will turn black and white and should look something like this:
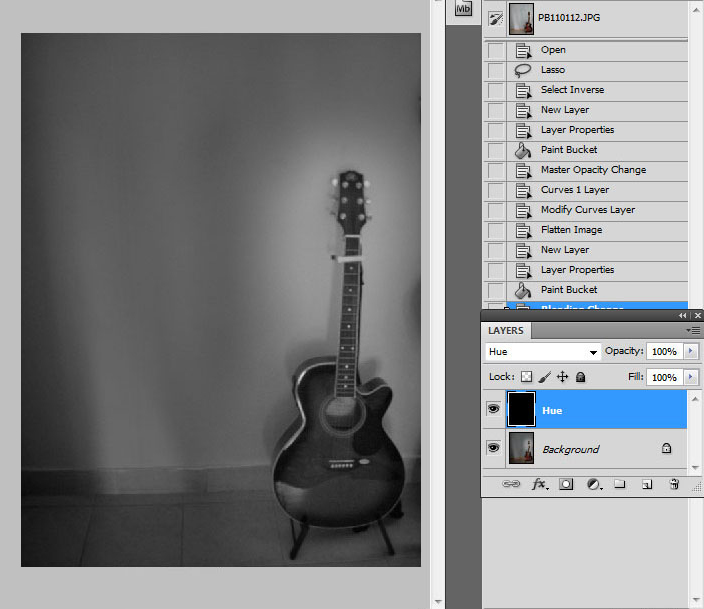
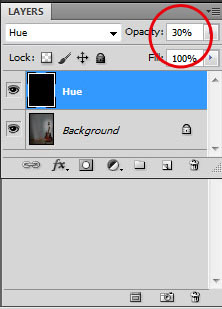
Now you need to adjust the opacity of the Hue layer between 30-50%
Final Touches!
Now all you have to do is sharpen your image or blur it as you like. You can even adjust the saturation level till you’re happy with the final results. And viola! Your new Photoshop creation that looks just like it’s taken by a Lomo camera!
Share and enjoy!




the area of selection for vigneting and curves we also can make with a brush in the Quick Mask mode
Nice article !! 🙂