Create Your Own Atom Bubble Style Event Flyer
In this tutorial, you will learn the steps in creating an “Atom” or “Bubble” style event flyer with Adobe Photoshop. The steps are not overly complicated so you need not worry about needing to be an expert to do this. With the correct creative resources and of course the instructions below, anyone can create an impressive flyer with this creative atom bubble style.
STEP 1
1. The first step is to open Adobe Photoshop and deal with the print-ready requirements for when you send your flyer to a commercial printer. In our example, we will be creating a portrait oriented flyer that is approximately half a typical letter sized paper. Note that you can set this to any dimension you like of course, especially if you will be printing with a professional printing firm. Our setting though here can be more easily applied to home printers as well though as it can be placed on letter paper. So with Photoshop open, create a new document by pressing CTRL+N and we enter the values listed below.
a. Width: 5.5 inches
b. Height: 8.5 inches
c. Resolution: 300ppi
d. Color Mode: CMYK

STEP 2
With the new document open, we start working with our background first. Plain white, is not really the ideal anymore when it comes to flyers, unless there is something specific that you want to do. So we fill our background layer with an off white color (#f4f4b6) and white color gradient. Just set one as the foreground color, one as the background color and use the Gradient tool to paint it up.
STEP 3
Then, we will load up a nice subtle line accent on the background. First, we downloaded these nice line brushes from a generous person in Deviant art here. Once downloaded and saved in a nice location, we go back to our design and select the brush tool. Then, we right click on the design to bring up the brush context menu. Click on the right arrow icon and then select the option to “Load Brushes…”
STEP 4
Then, just navigate to the brush files you just downloaded to install those brushes. Then, go to Layer -> New Layer… On the window that opens set the name for this new layer as “Line accents” or something similar.
STEP 5
Afterwards, right click again on the design area with the brush tool and look for the new brushes you just installed. Choose a line accent brush that you like and adjust the size as necessary. Then, with a set theme color paint up your line accent into the new layer.
STEP 6
Next, reduce the opacity of our line accent layer to around 30%. This makes the lines more subtle and more integrated as the background.
STEP 7
Now we create our first bubble or atom. Set the color of our circle shape by setting the foreground color to your chosen theme hue. Using the Elliptical shape tool we inscribe a colored circle into our design. Remember to hold down the SHIFT key as you do this to create a perfect constrained circle.
STEP 8
To make our circle look a bit more interesting, double click on it to access its layer style. Once the layer styles window opens click on the checkbox for “inner shadow”. Change the following values in its properties.
a. Opacity: 50%
b. Distance: 0px
c. Size: 50px
d. Leave the rest to default
STEP 9
Once you press OK, you will see that the subtle shadow adds a more dynamic, even natural looking circle shape, much like a bubble or an atom. This will be where our main title and content will be placed.
STEP 10
We then create a few more bubble or atoms. One for our flyer image, and 3 smaller ones for minor details and logos. We have varied the colors according to our theme.
STEP 11
We should also use the same layer style for the other bubble-atoms. To do this quickly, first right click on our first bubble atom and then select the option to “copy layer style”.
STEP 12
Then, right click on the destination shape (in this case the red circle) and then we choose the option “paste layer style”. This quickly applies all the same settings of the original layer shape to our selected layer.
STEP 13
To draw the connectors of our circles, we will use the line shape tool. However, you will need to adjust its properties/options first. Click on the line shape tool in the tools panel first. Then, look at the options bar above. Set the shape options to “Shape Layers”. Make sure you are using the Line Shape tool and then adjust the line weight accordingly. You can start testing the line after that to see if it is in the right thickness. Adjust as necessary until you have the line style that you want. In this example, we are using the same very dark grey color of our circles.
STEP 14
With your line shape settings ready, just inscribe the line connectors, connecting all our bubble-atoms. It is important that you place this line shape layers just above our line accents but directly below all the circles.
STEP 15
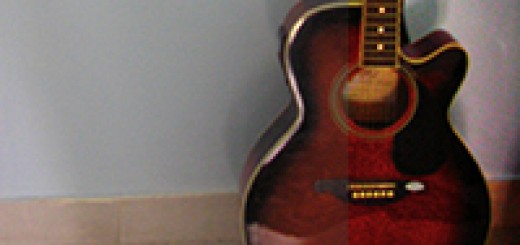
The next stage is to add images. We will be adding two images, one on the red circle and one on one of the black circles. First let us work on the black circle as it is the easier one to do. Just copy paste your image into our design. Our example image comes from here. We scale it down by pressing CTRL+T and positioning it just above our goal circle. Also make sure that the image layer instance is just above that circle as well.
STEP 16
Now, right click on our image layer in the layers panel. In the context menu select the option to
STEP 17
You will then see the image get clipped according to the shape below. Note that you can still move the image and the clipping mask is still there. Also, we change its blend mode to “Overlay” and reduce its opacity to 90%.
STEP 18
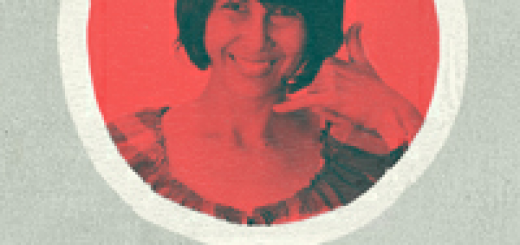
We then do the same to this free image here (We place it above our red circle layer). Then apply the clipping mask. We change its blend mode to “linear light” here and change the opacity to 90%.
STEP 19
Great! Now it is time to add text. Make sure of course that you use text that has a contrasting color with the circles. You should also try to use more sans serif type font styles that are clean and straight. Her we are using Helvetica variations.
STEP 20
Finally we add in a company logo or an establishment logo on top. For additional accents put in additional color circles to add more detail.
STEP 21
Great! This gives us a nice flyer with our bubble or atom style.
STEP 22
If you want, you can also add additional grunge elements in the background to mess it up a bit. You can use these brushes here and then create a new layer just above the lines layer to paint up those grunge brushes.
FINAL IMAGE
That finishes our Atom Bubble style event flyer. Now you can use the same styles for your own event flyers.


Awesome tut… you’ve done a great job!